You can create multiple test cases at project level and, record expected and actual results. Using these test cases, you can test data mappings and ETL process. You can also manage test cases as per your requirements.
To create test cases, follow these steps:
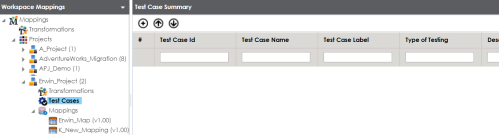
- In the Workspace Mappings pane, expand a project.
- Click the Test Cases node.
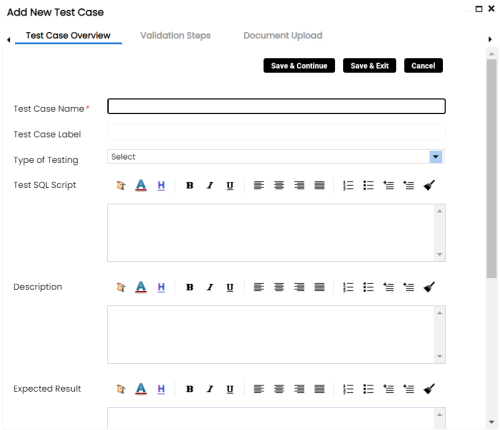
- Click
 .
. - Enter appropriate values in the fields. Fields marked with a red asterisk are mandatory. Refer to the following table for field descriptions.
- Click Save and Exit.
The Test Case Summary pane appears.
The Add New Test Case page appears.
|
Field Name |
Description |
|---|---|
|
Test Case Name |
Specifies the name of the test case. For example, Verifying the Completeness of Source Metadata. |
|
Test Case Label |
Specifies the unique label for the test case. For example, Source Metadata. |
|
Type of Testing |
Specifies the type of testing. For example, Metadata Testing. |
|
Test SQL Script |
Specifies the SQL script required in the test execution. For example, select * from dbo.ADS_ASSOCIATIONS. |
|
Description |
Specifies the test objective in brief. For example: The objective of the test case is to verify the completeness of source metadata. |
|
Expected Result |
Specifies the expected result of the test case in detail. For example: The source table should have 50 columns. |
|
Actual Result |
Specifies the actual test result after the execution of the test. For example: The source table has 39 columns. |
|
Testing Comments |
Specifies the testing comments about the test case. For example: The source metadata was scanned from a Sql Server database. |
The test case is created and saved under the Test Cases node.
For more information on test cases, refer to the Creating and Managing Test Cases topic.